
Traffic is the important factor which will determine our success in the online business.
You should try to make use of the best channels to drive traffic to your website.
One such channel which many websites do not make use is push notification.
Push notification is the best way to notify your readers about your latest posts or important updates in your website or blog.
In today’s blog let me guide you through the process on how to add or enable push notification to a wordpress website.
PushEngage – Mobile and Web Push Notifications Service
PushEngage is a push notification service that can be used not only in WordPress but in other platforms like BlogSpot, Joomla, Drupal and much more.
PushEngage supports most of the browsers like Chrome, FireFox, Safari etc.
It even supports to send notifications in mobile.
It is very easy to enable this service in your website.
Let me show you a step by step tutorial on how to add it to your WordPress site.
Step 1: You need to first create an account in PushEngage.
Don’t worry it has a FREE service to be used by small and medium sized blogs. Once you feel that your traffic is increasing through this service then you can consider upgrading it.

While logging into the account it will ask for your website name.
Once you signed up, you will receive a verification code to your registered email Id.
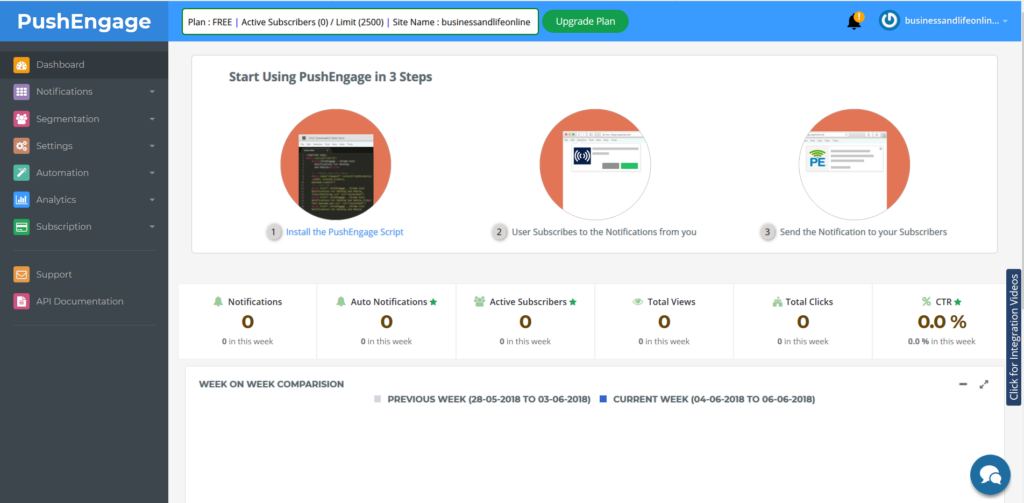
Once you verify your account, you will be able to enter inside the PushEngage dashboard.
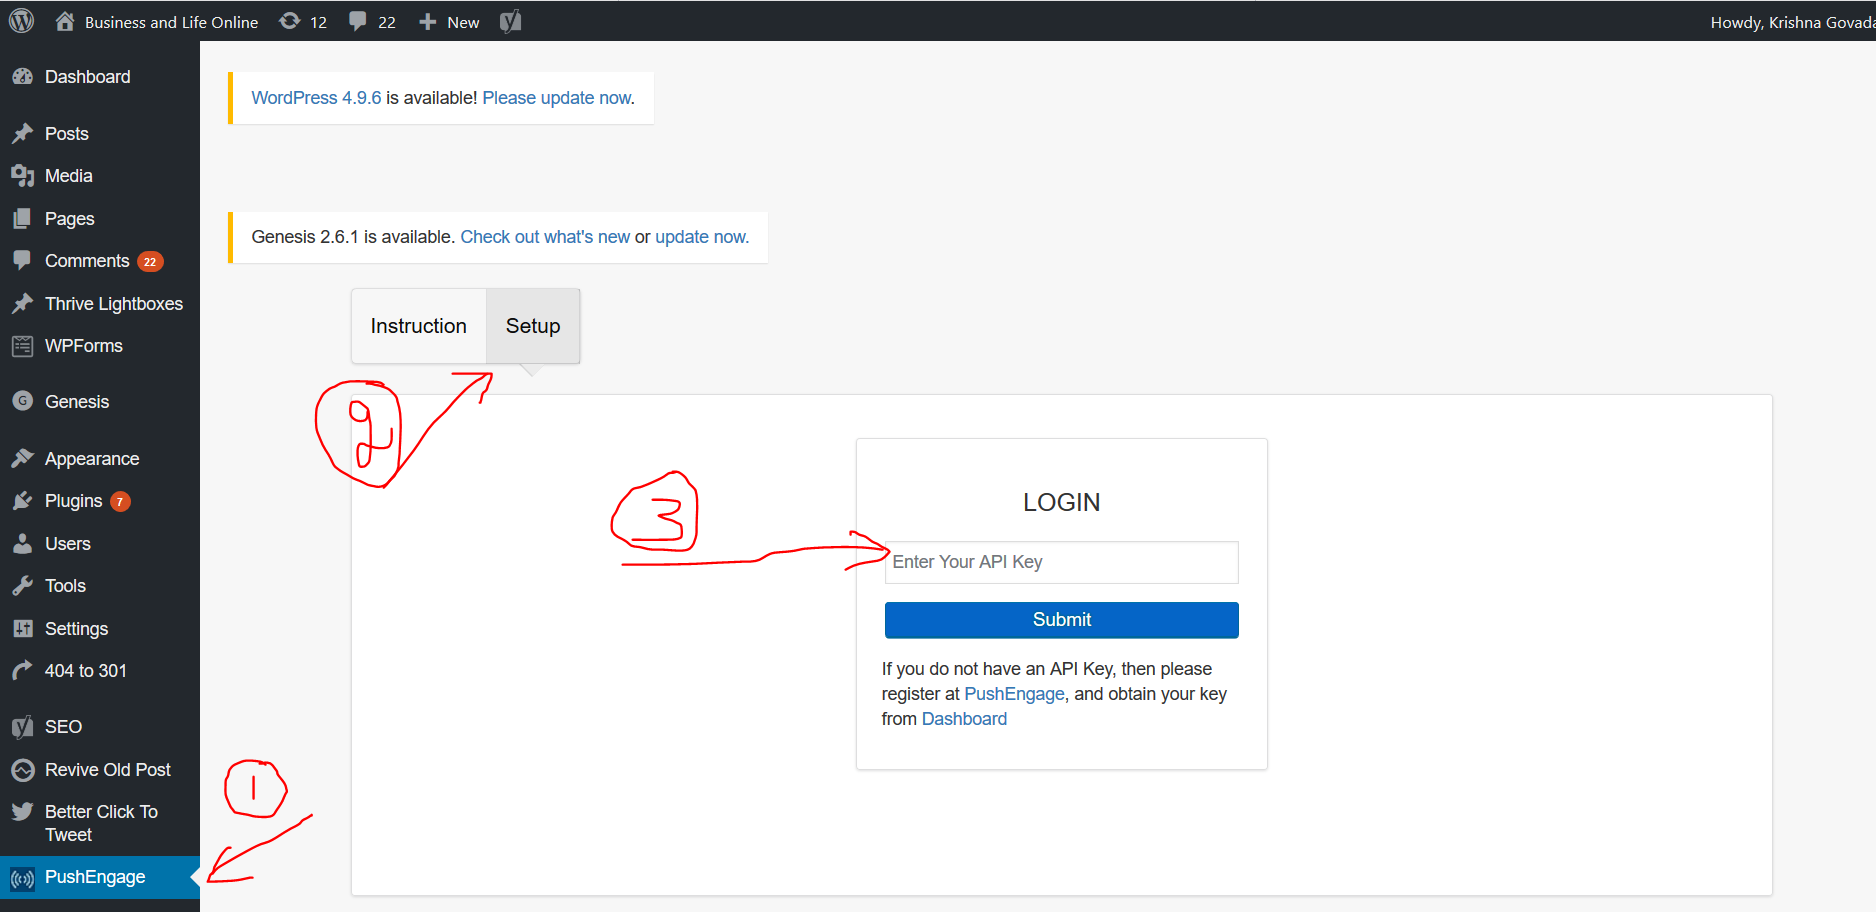
Step 2: Now Go to your wordpress dashboard, Install PushEngage plugin and activate.
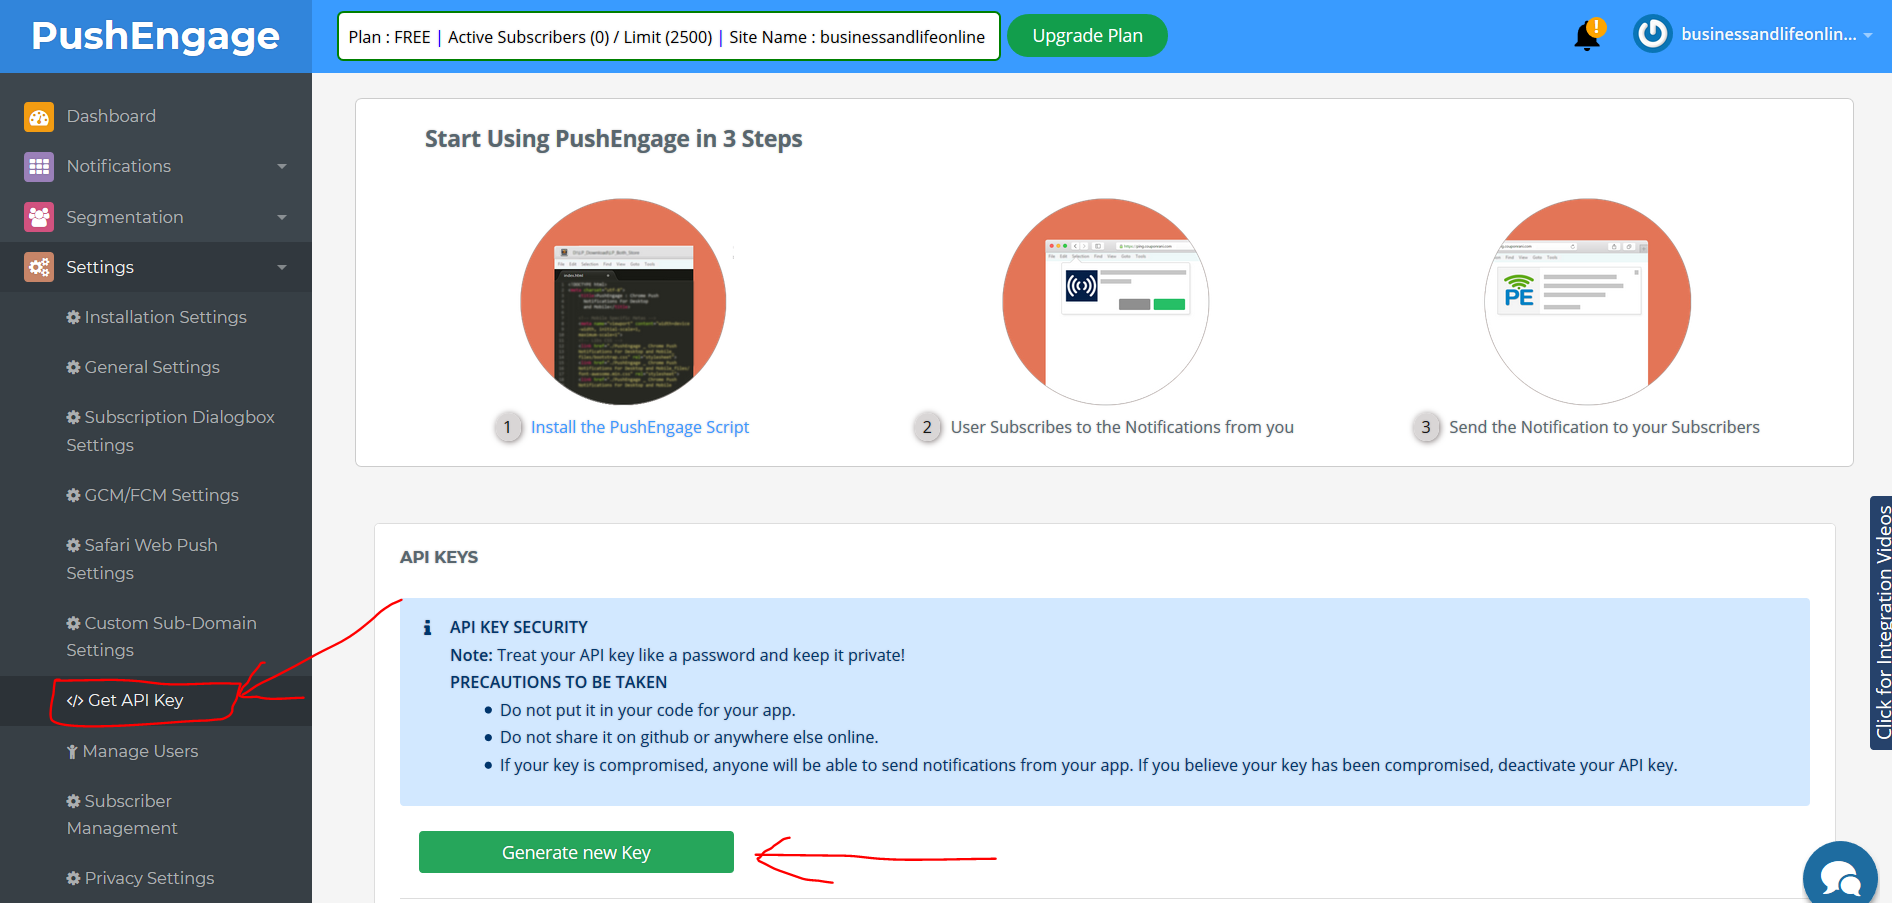
For the plugin to get activated you need to add API key. You can get this key from PushEngage dashboard. You can generate a new API key.
Step 3: Now go back to your WordPress dashboard and paste the key there and activate the plugin.
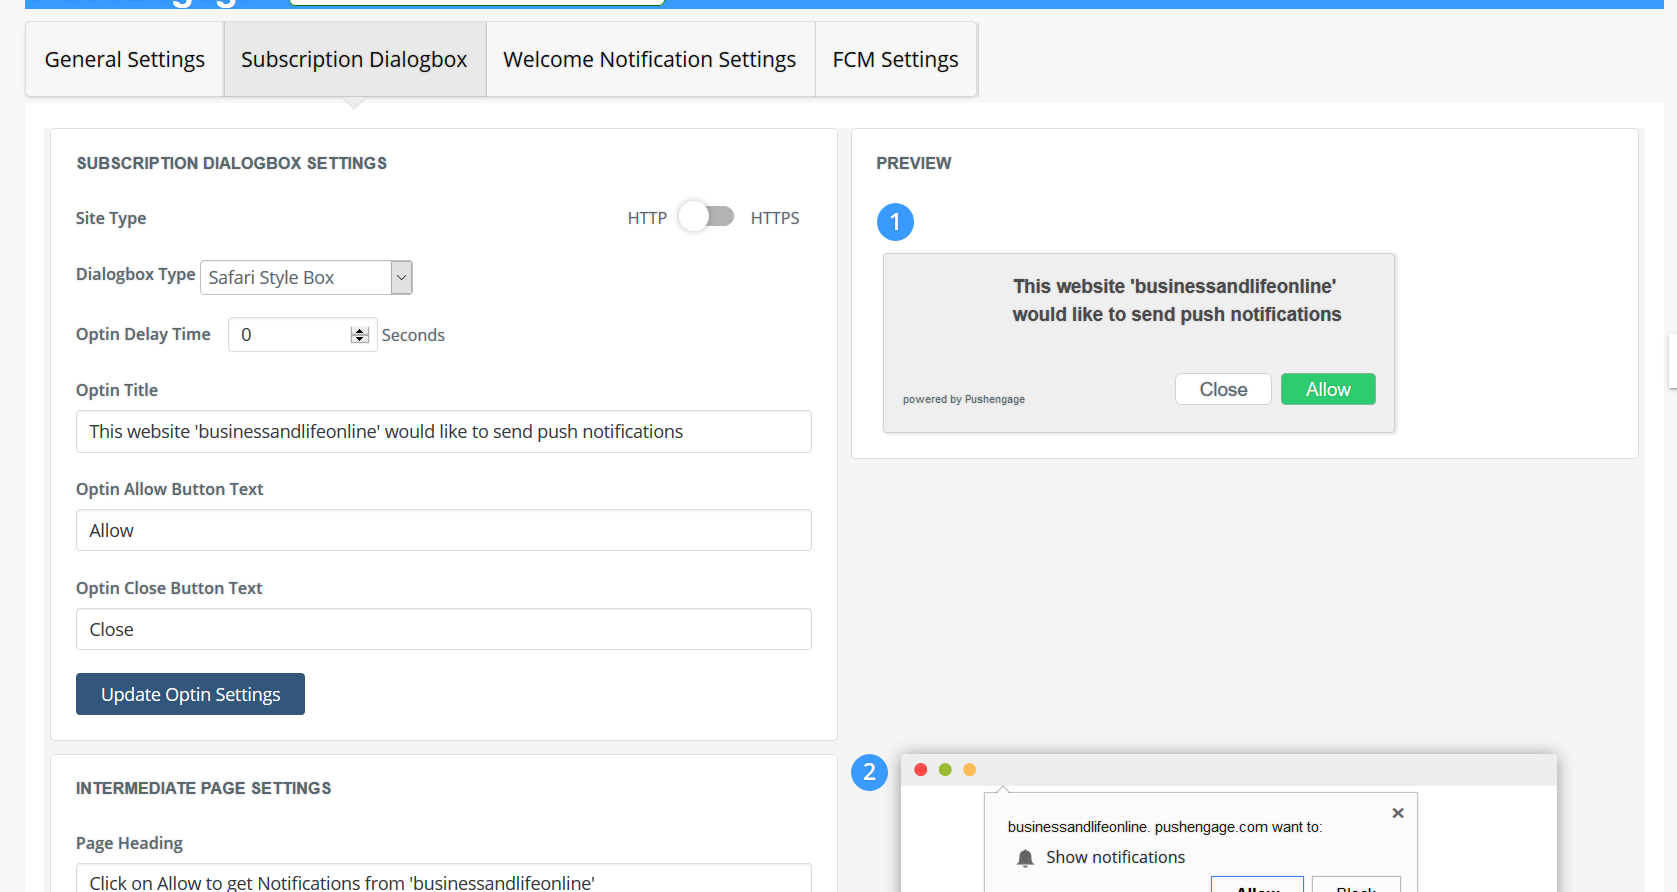
Step 4: Update settings based on your Need
Conclusion
Congratulations, you have now successfully enabled push notifications to your website.
Start enjoying the traffic you are getting from now through this and increase your business.
All the best!
Please feel free to comment in the comments section below.